Case Study – Geotag and GeoSearch in ArcGIS for SharePoint
One of the most powerful features in ArcGIS for SharePoint is the ability to geotag documents, document sets, images, videos, and even folders.
When you add data to the map in ArcGIS for SharePoint, you can use that data as a reference layer for geotagging documents. Layers and their specified attributes provide context for the geotag and geosearch features. As a user, you can use the map to tag all your SharePoint documents with location-based tags that allow you to quickly find those documents by clicking features on a reference layer on the map.
When you drag a document from the list of documents in your SharePoint site onto a location on the map, it will generate geotags for those documents using the attribute specified for each layer at that location. You can also quickly retrieve the appropriate documents by clicking the location on the map or by typing specific keywords.
Workflow
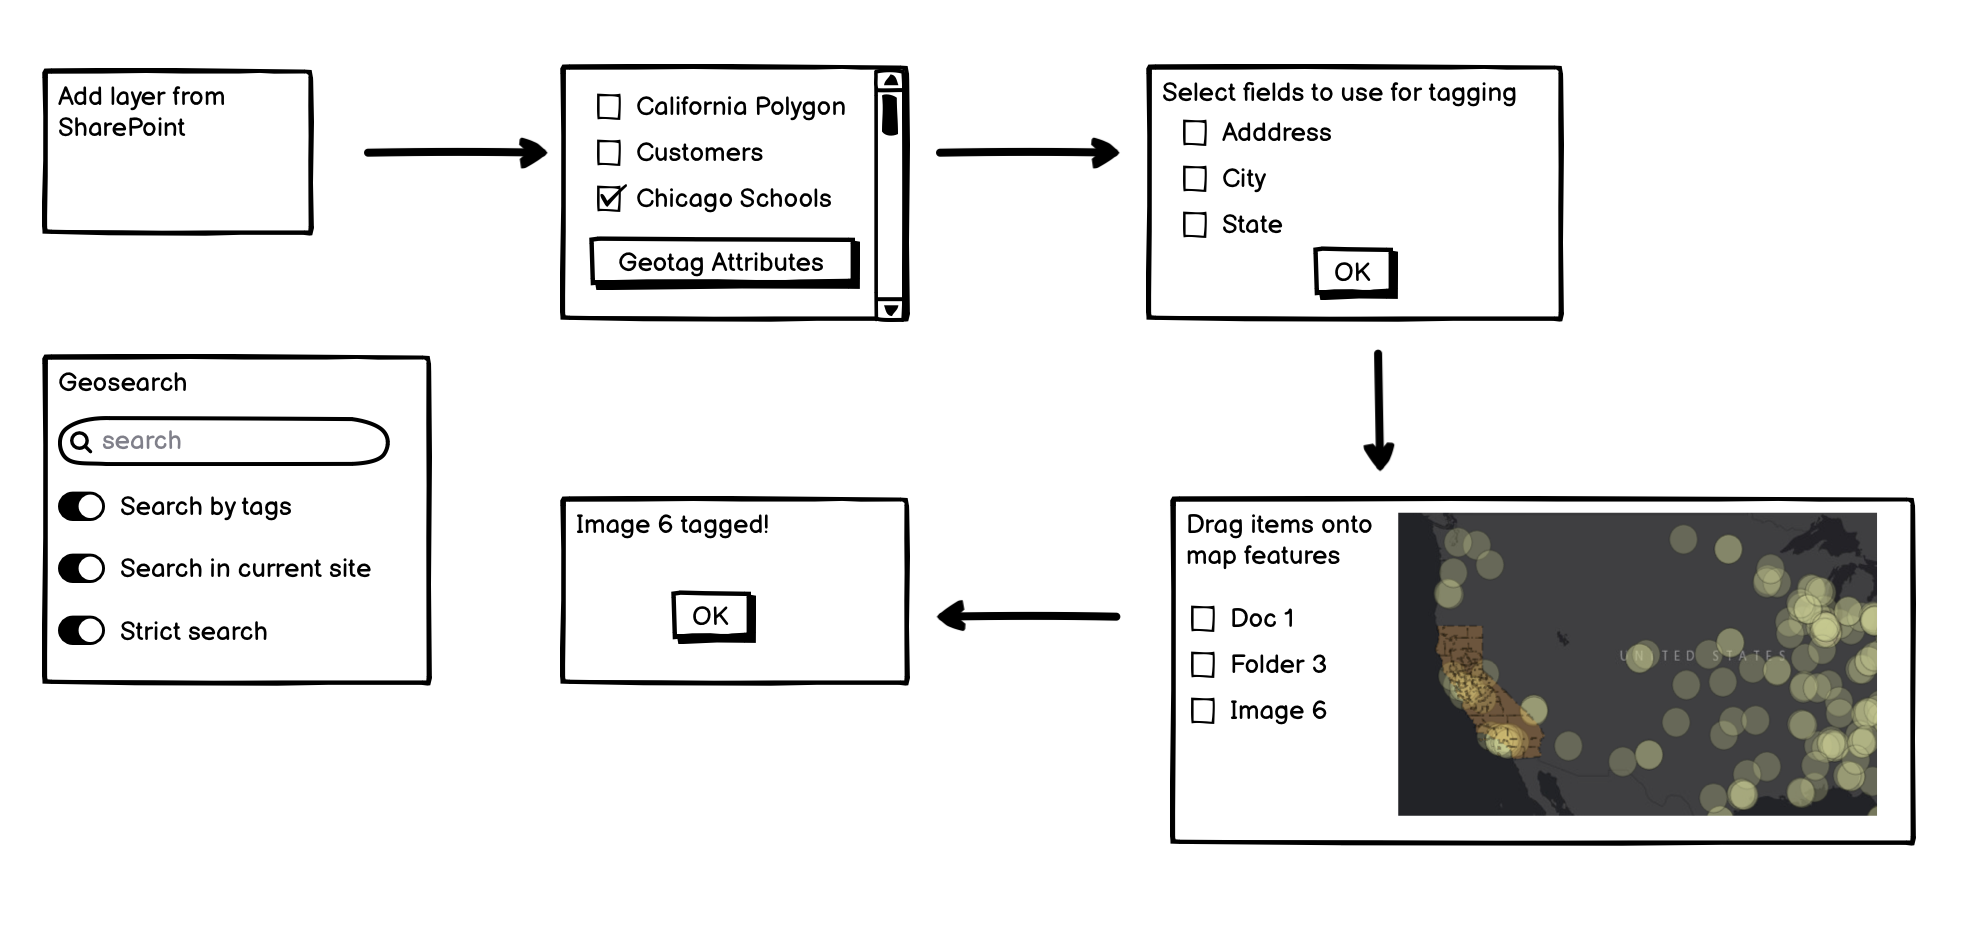
The workflow is quite simple:
- Add one or more layers from SharePoint to the map
- Select the layer with the attributes to be used to geotag the items
- Select the attributes within the layer to be used to geotag the items
- To geotag, select the document, folder, or image, and drag it onto the map features where the attributes have been selected
- The user can then easily search any of the geotags to display any of the items that have been geotagged
Pain Points
In the previous version of ArcGIS for SharePoint, the ability to Geotag and Geosearch was a separate application. This was confusing to the user and there was no good technical or business justification why it was developed as a separate app. Also, it was also developed with minimal design input and the user interface is not intuitive at all. A good example is that the user needs to select the field attribute(s) at the layer tab before attempting to geotag any items. Any attempts to geotag would fail if this step is skipped and there are no indicators or error messages. It took most users over 30 min to realize this was the case and the only way to figure this out was through the help documentation.
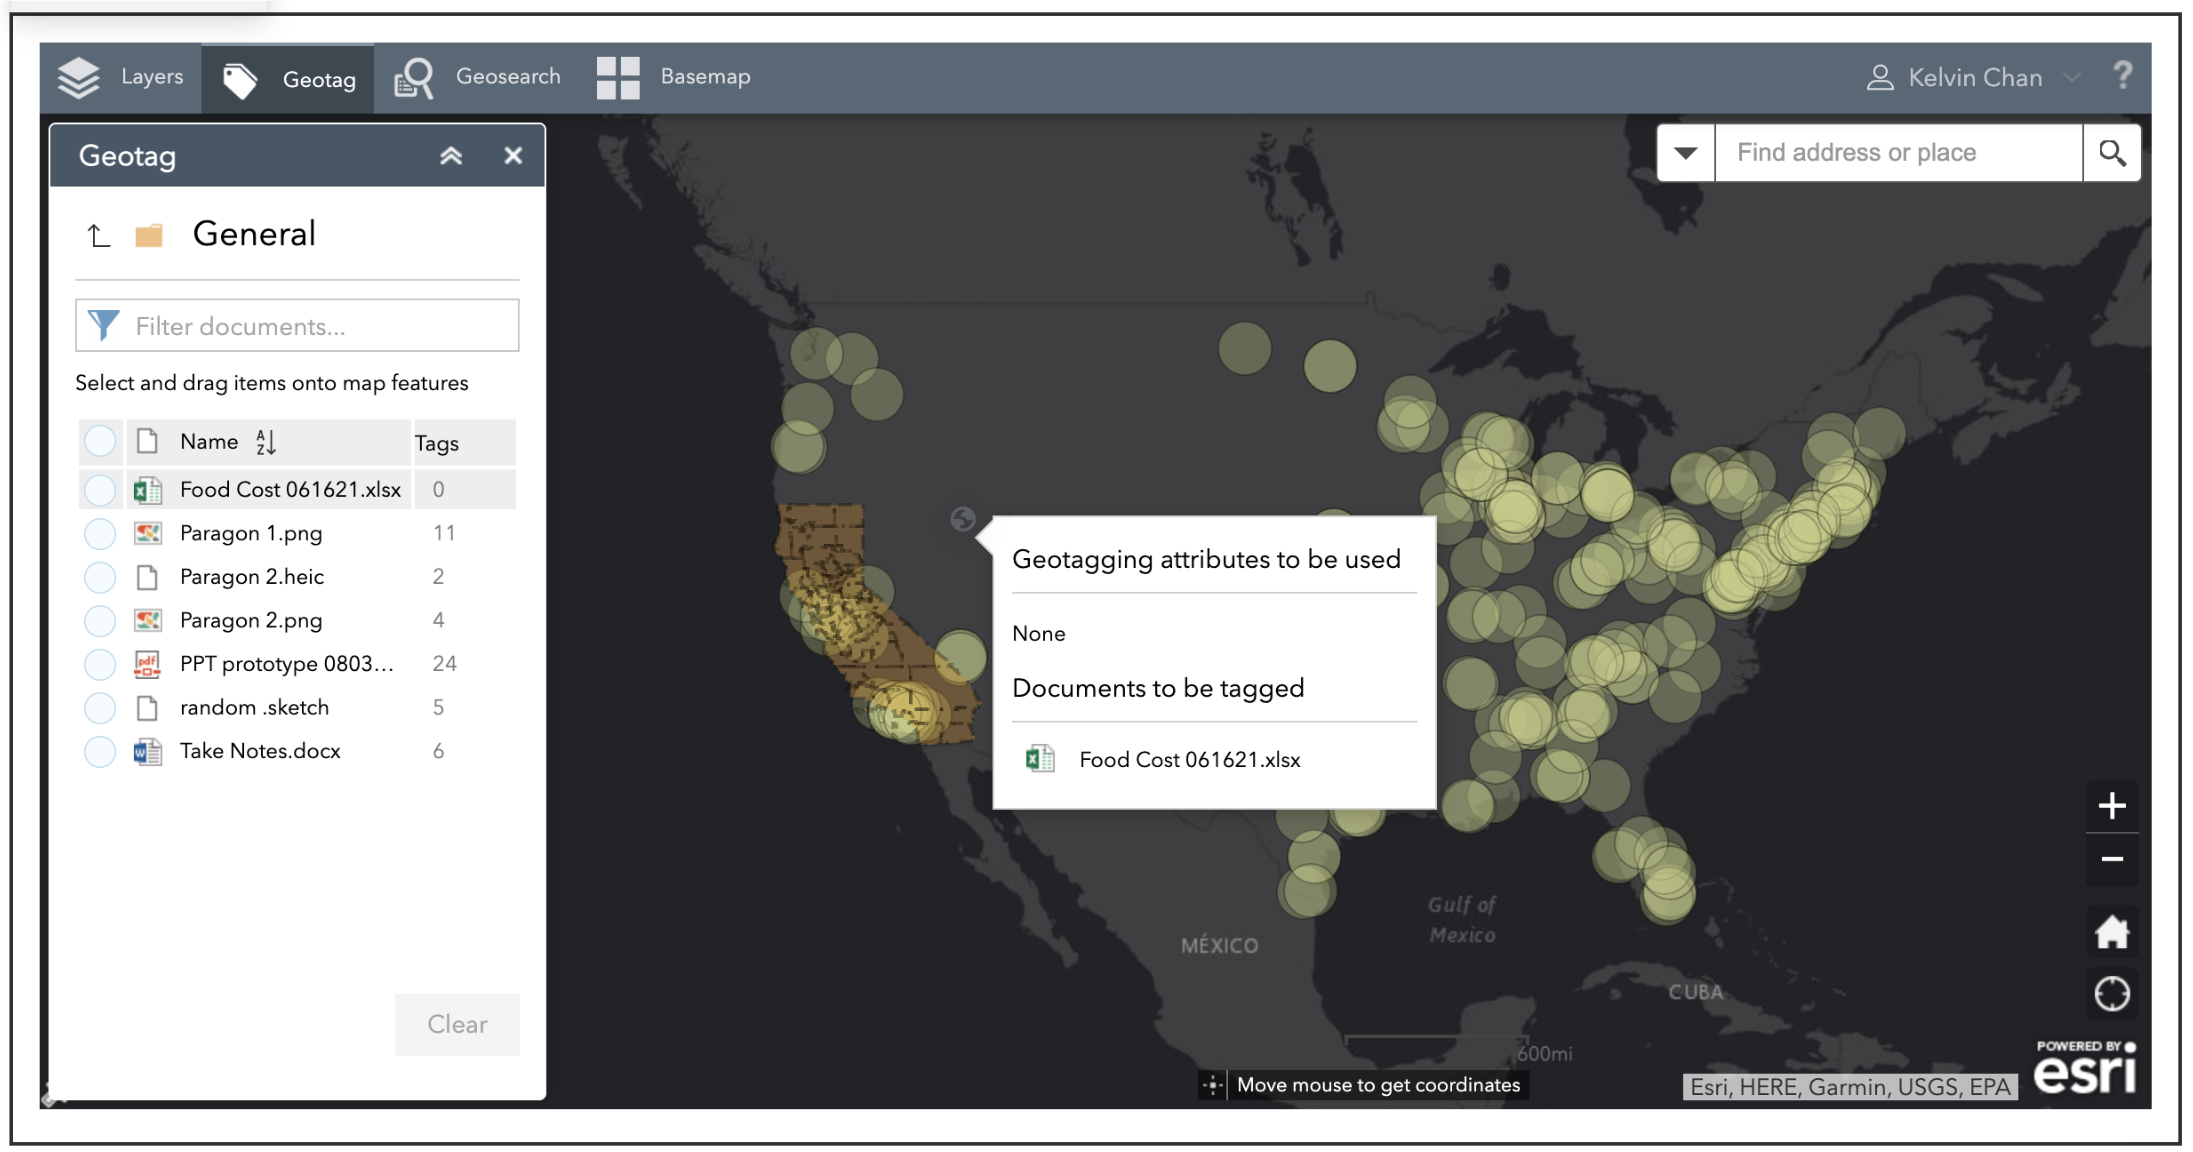
Here is a screenshot of the Geotag UI where a user attempts to geotag an item but to no avail. There are no indicators that this item will not be geotagged because no attributes have been set.
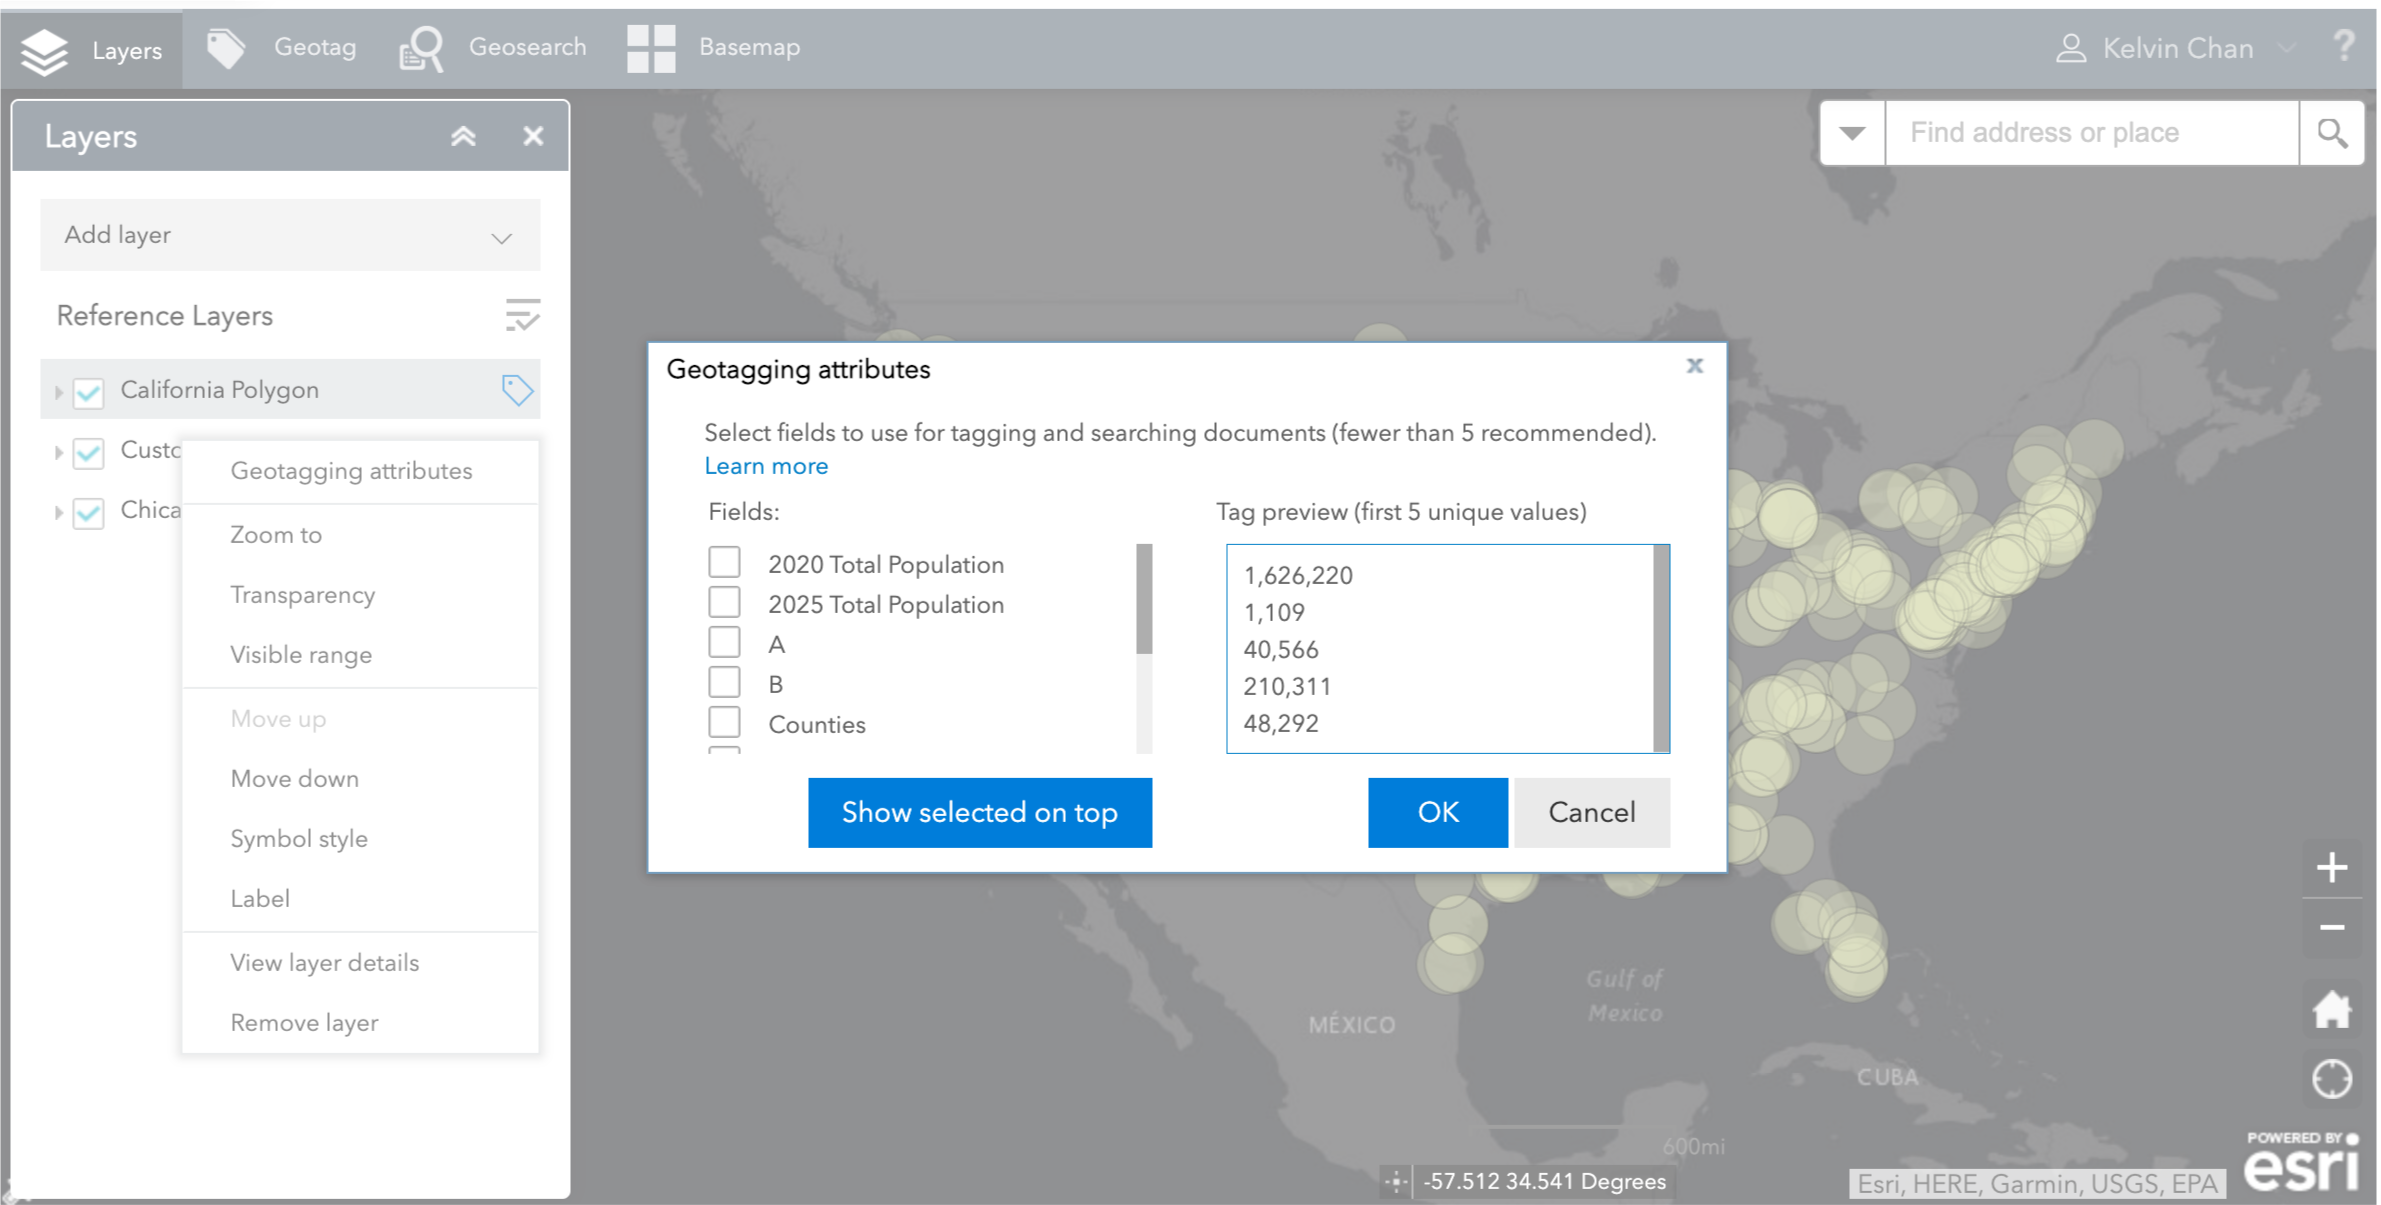
The user will realize that the attributes must be set at the Layers tab. Once the user launches "Geotagging attributes" feature in the more options, a modal dialog appears. There is a list of checkboxes to select the attributes and a preview list. Unfortunately, this dialog box obscures the majority of the map. It is also not clear why this is a modal dialog. Also, after speaking with a few customers, the preview list is useless and not needed at all.
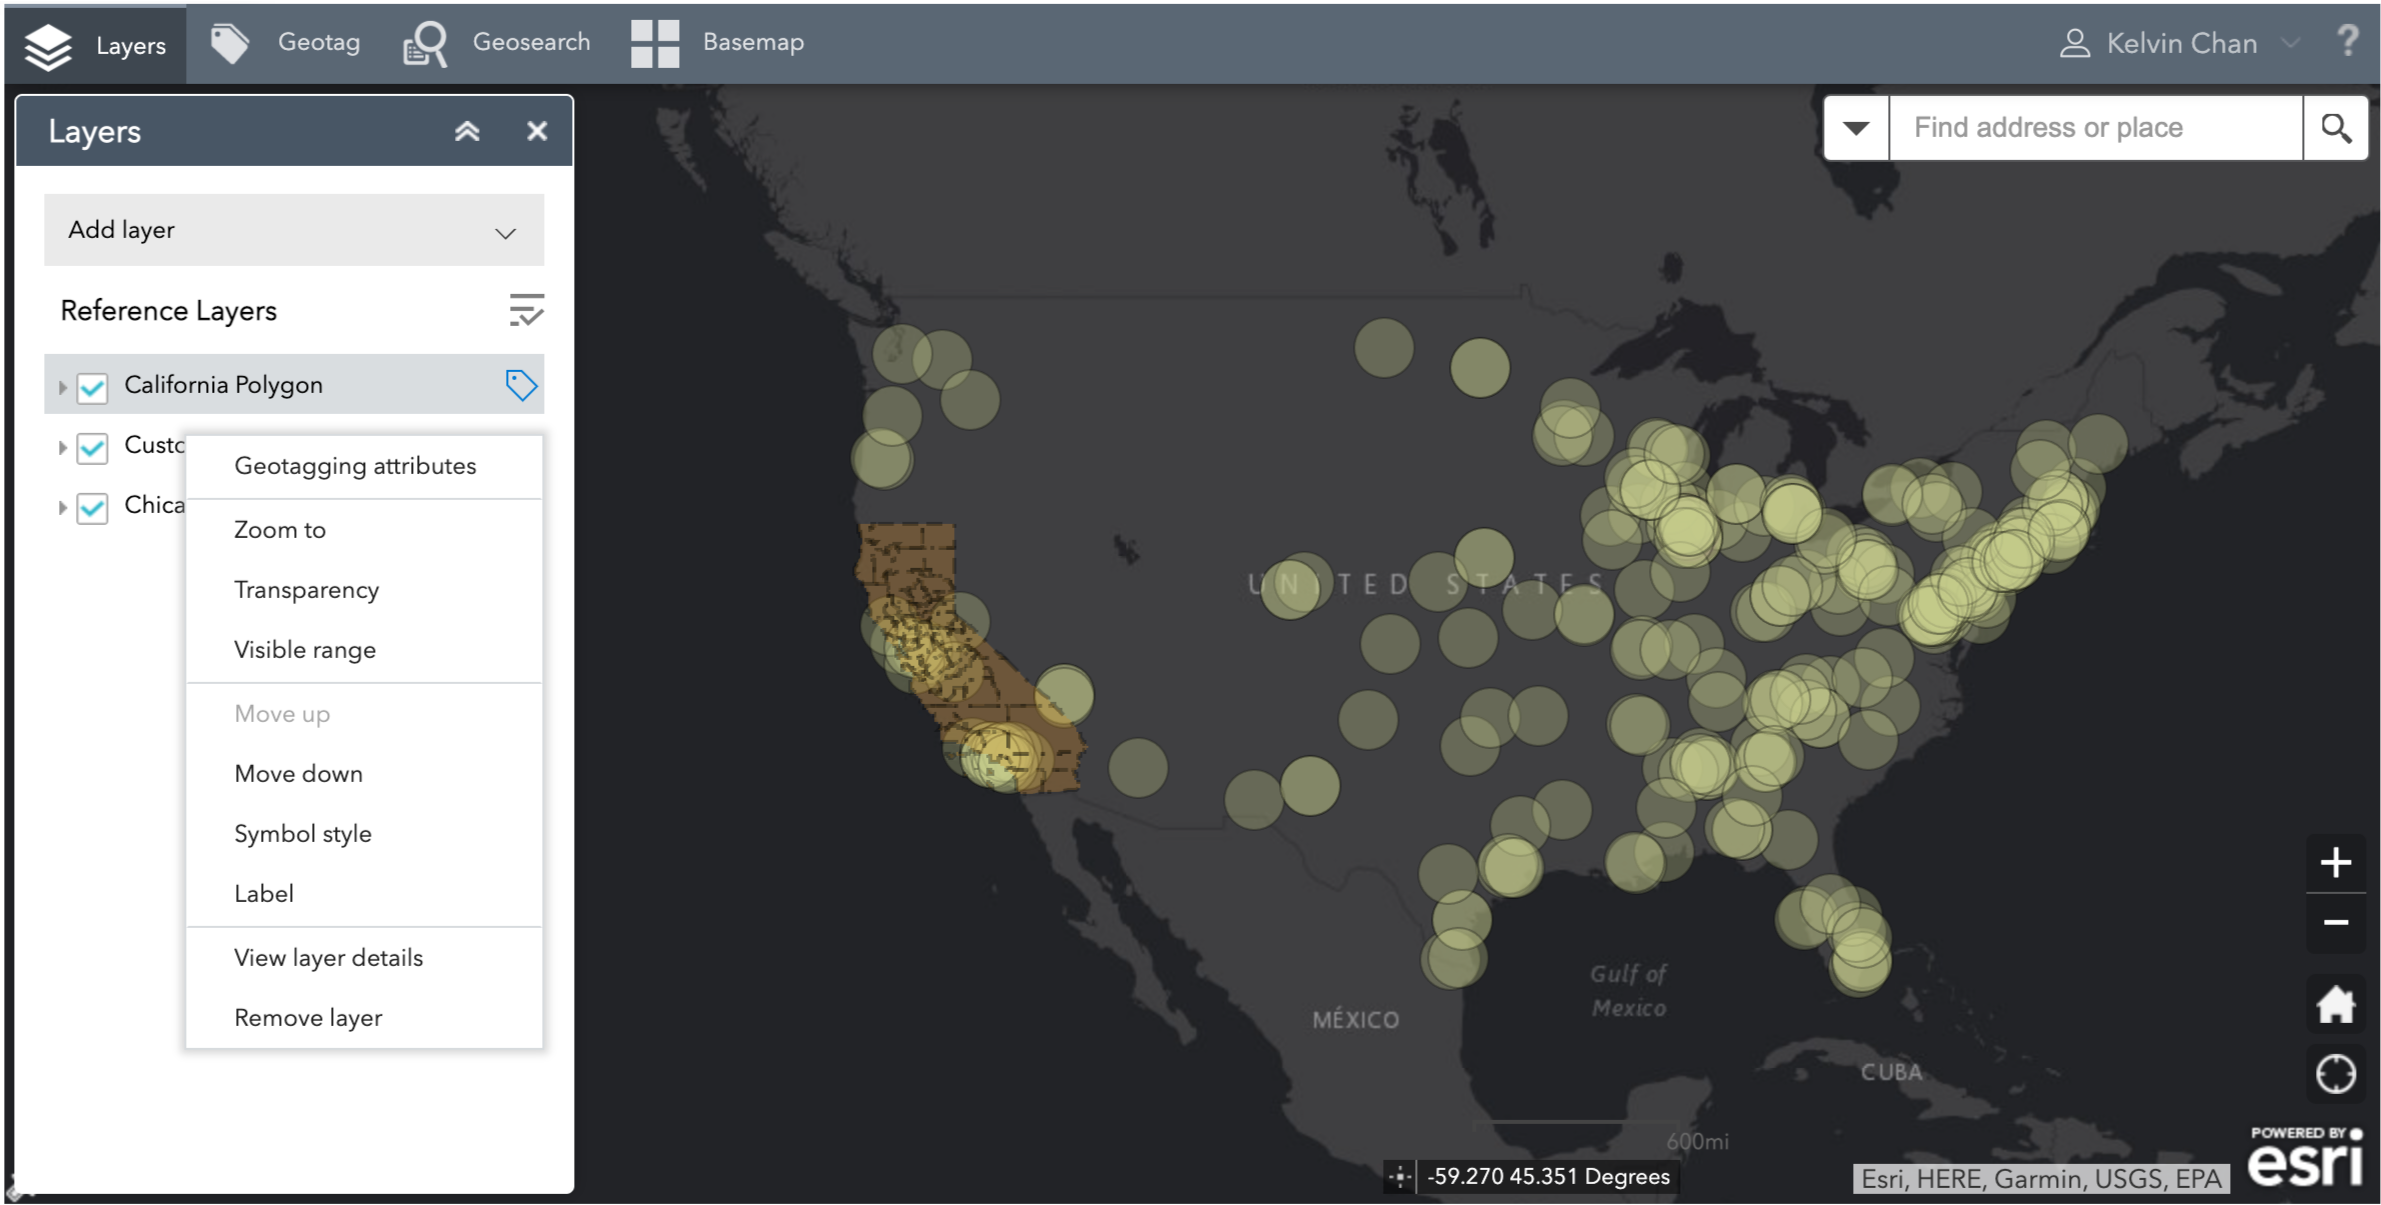
After selecting the attributes, a label icon appears next to the layer name but does not provide an intuitive way to inform the user to go to the "Geotag" tab to start geotagging items. The overall workflow is broken and is one of the biggest complaints from our customers.
Solution
The very first thing that we did during the planning phase was to check with development if it was technically feasible to merge the two applications together. Fortunately, the answer was yes, and it was completed in the release.
Secondly, given the requirements haven't changed significantly from the previous version, I decided to design a custom widget where the workflow would be more intuitive to set the attributes and geotag items. I also incorporated the Fluent UI components to ensure a more seamless experience with SharePoint. The widget would consist of 3 parts - Set Attributes, Geotag, and Geosearch. Accessing Geotag would only be available if one or more attributes have been set.
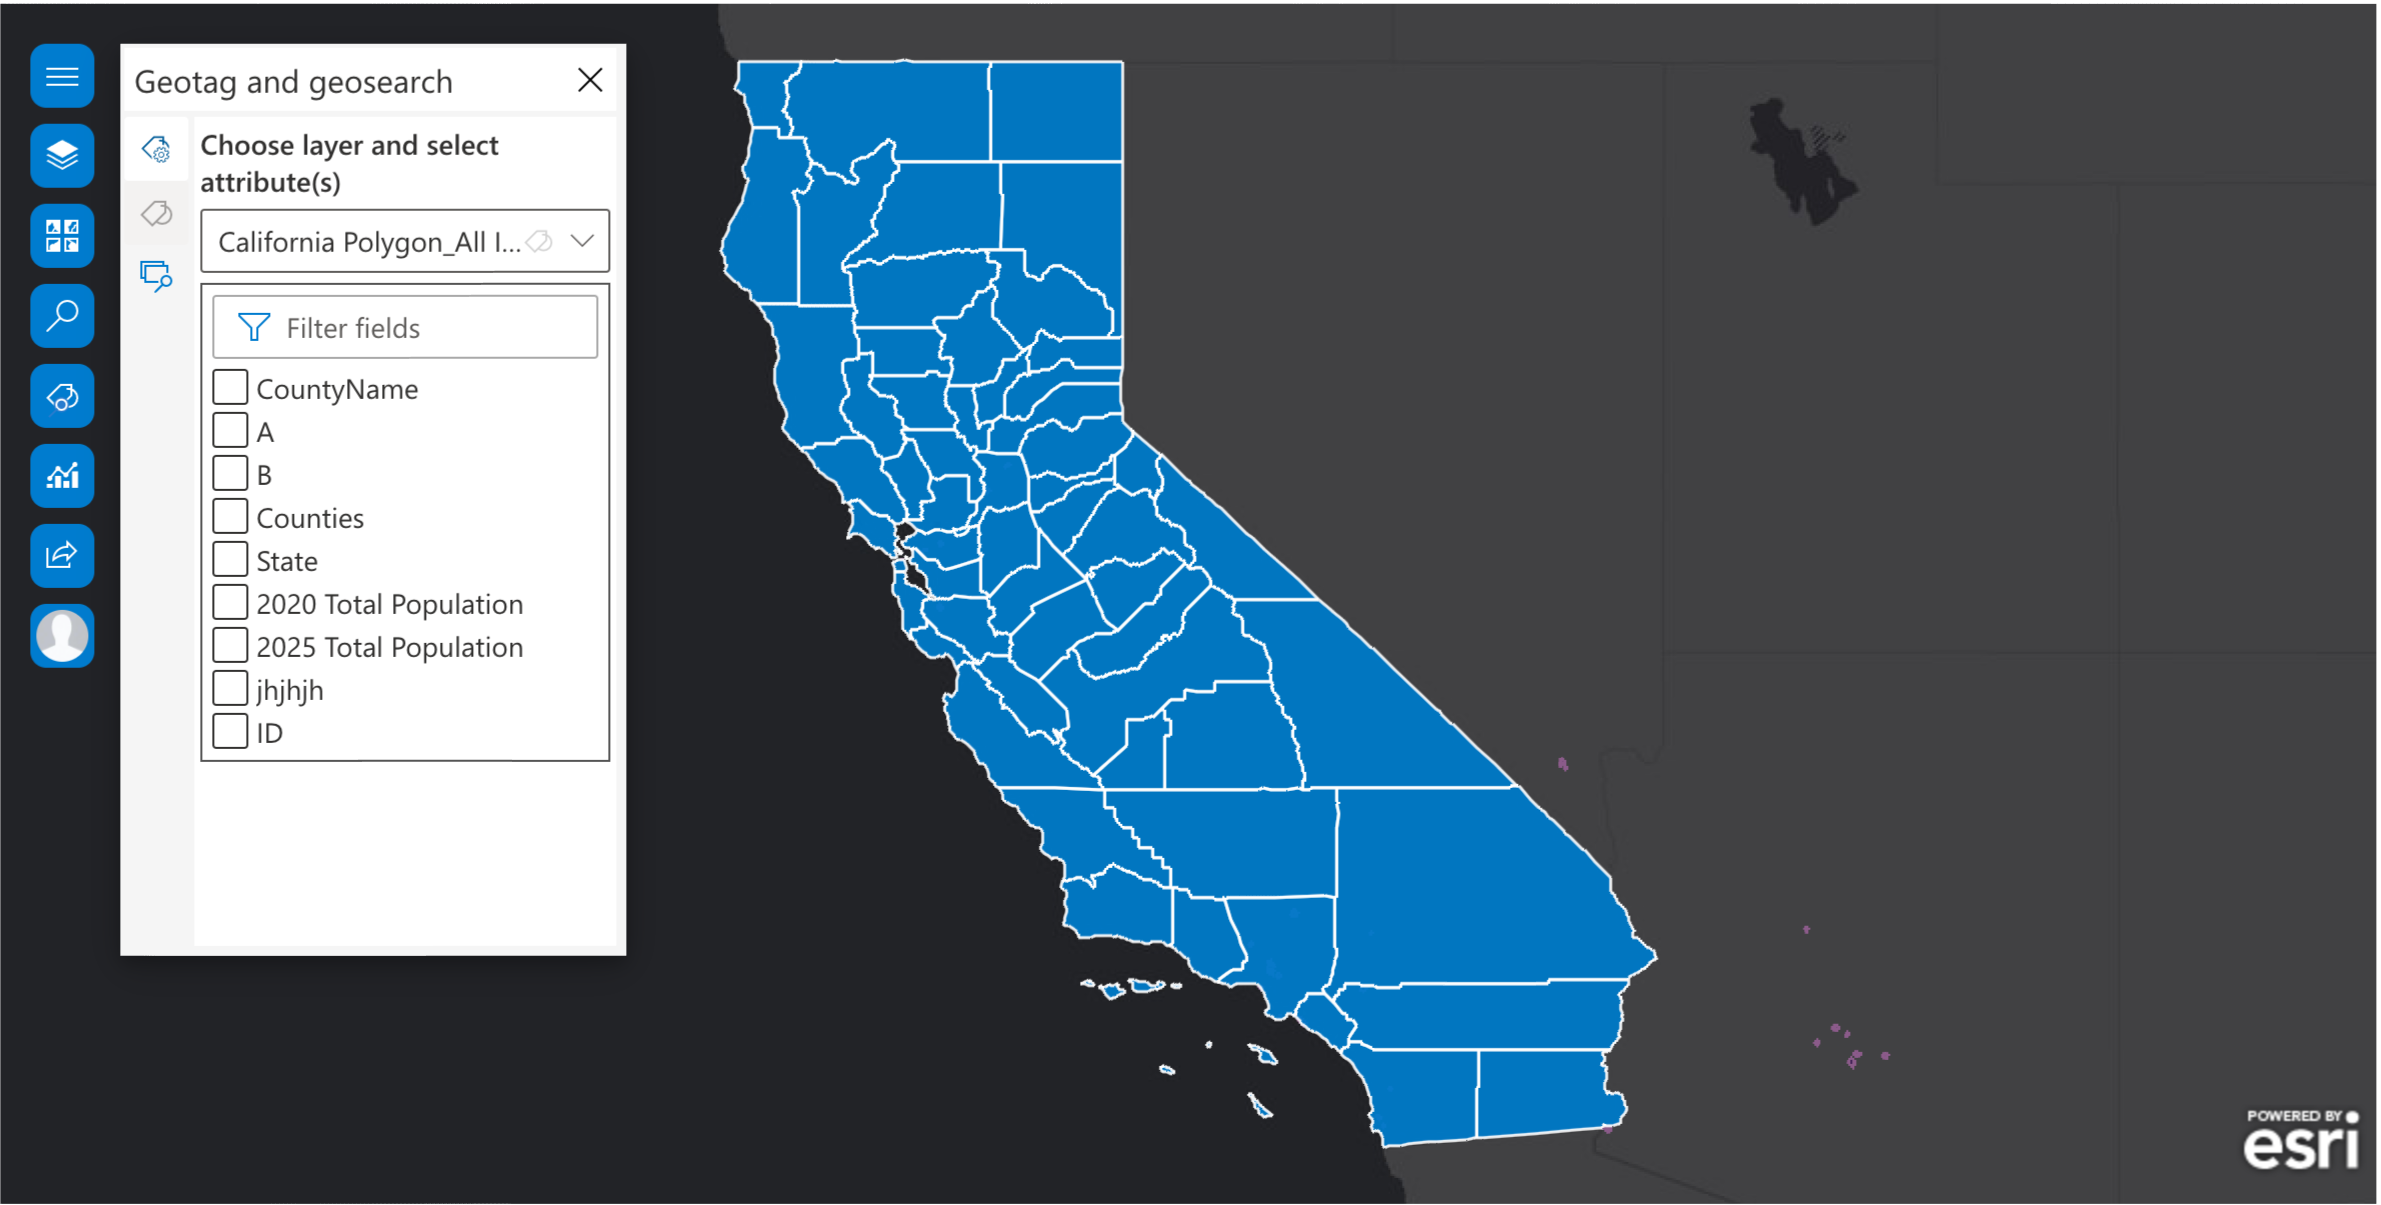
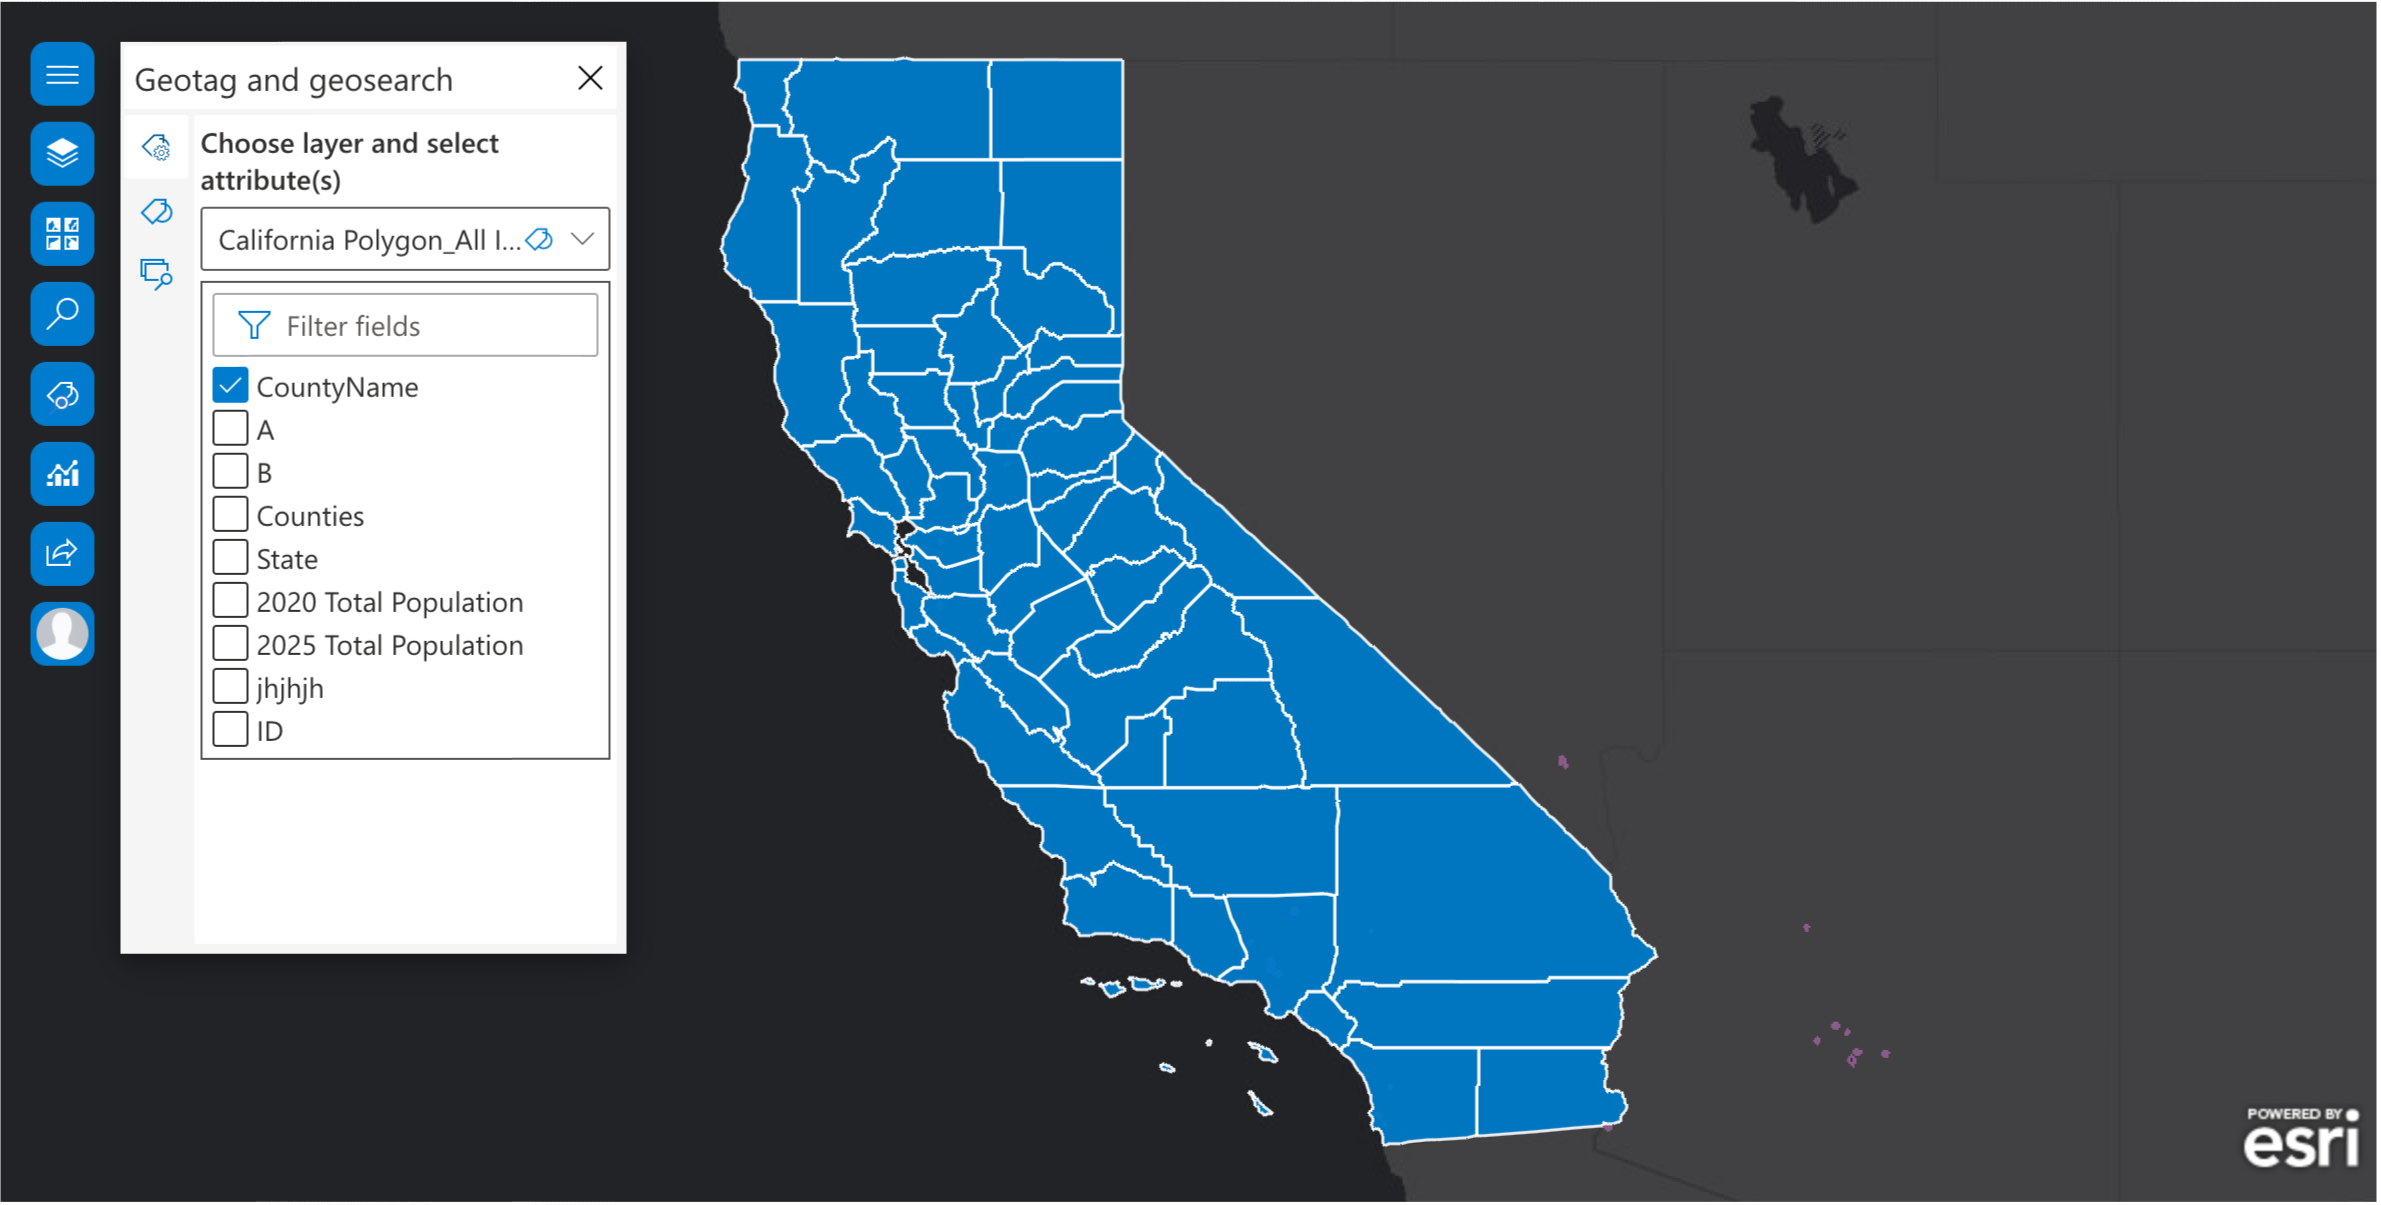
Note in the images above, the "geotag" icon in the left navigation is only enabled when one or more attributes have been selected. The workflow is top to bottom providing a better flow to the process. The layers can also be accessed through a drop down instead of the full list to reduce vertical space and as an added bonus, we now allow for layer name filtering.
Geotagging items is quite simple now. All the user needs to do is drag any of the items onto a map feature and the geotag is displayed in a flyout with the attribute name(s).
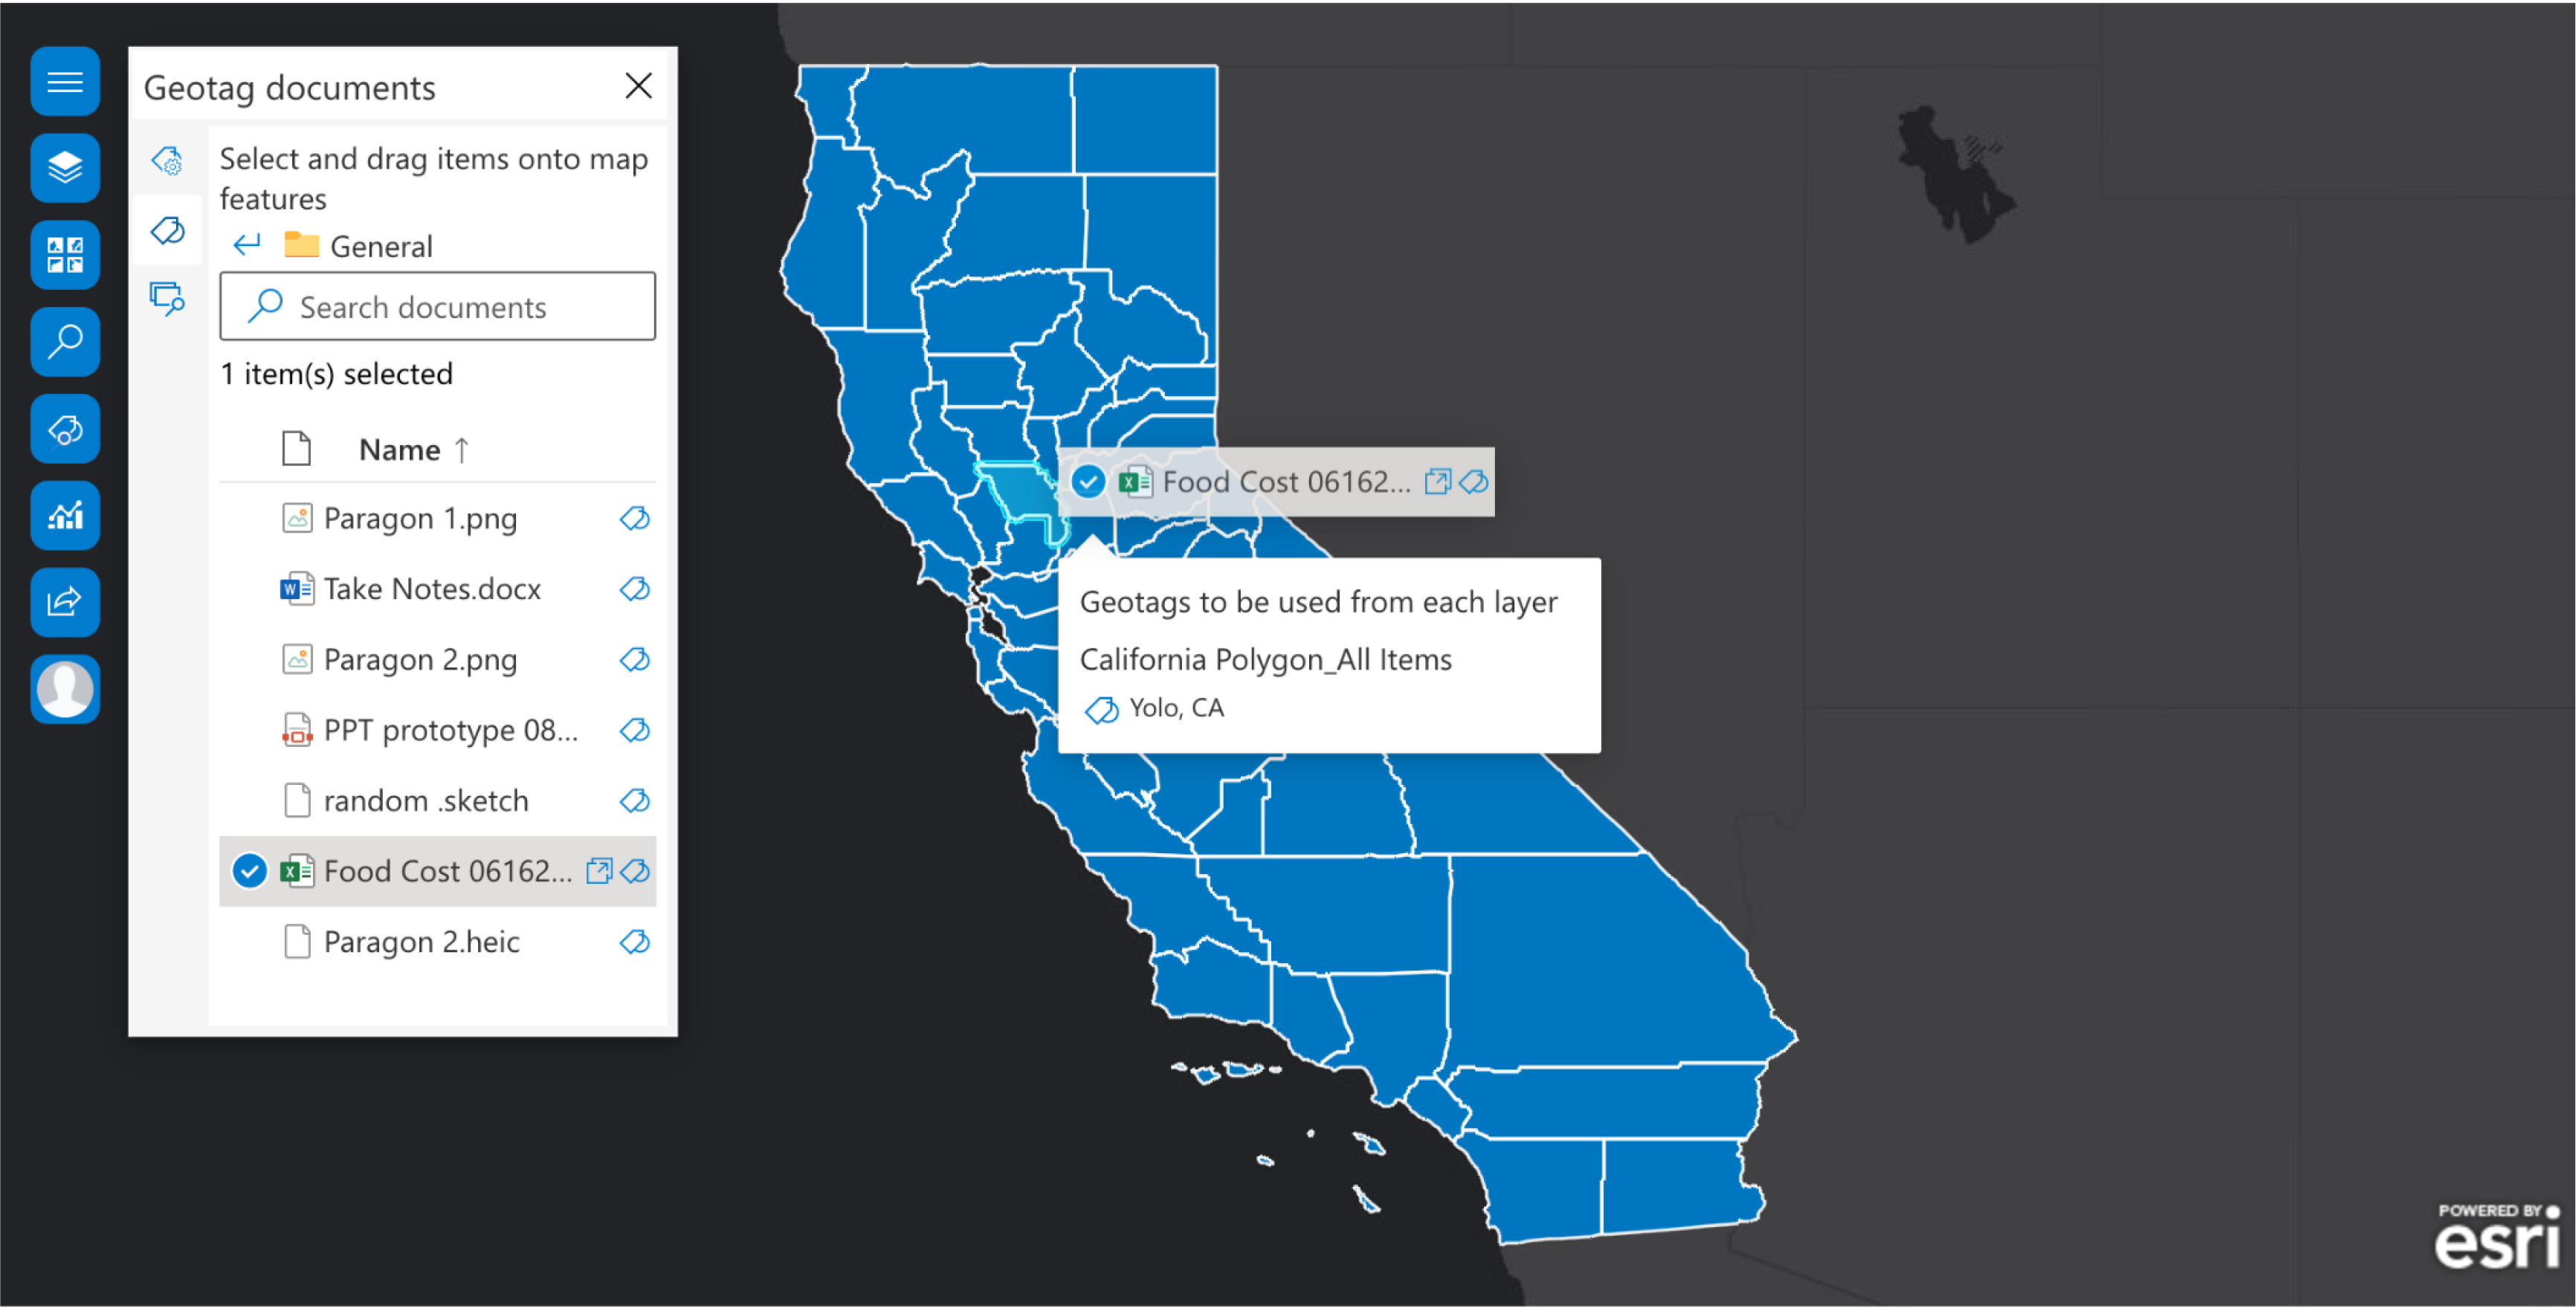
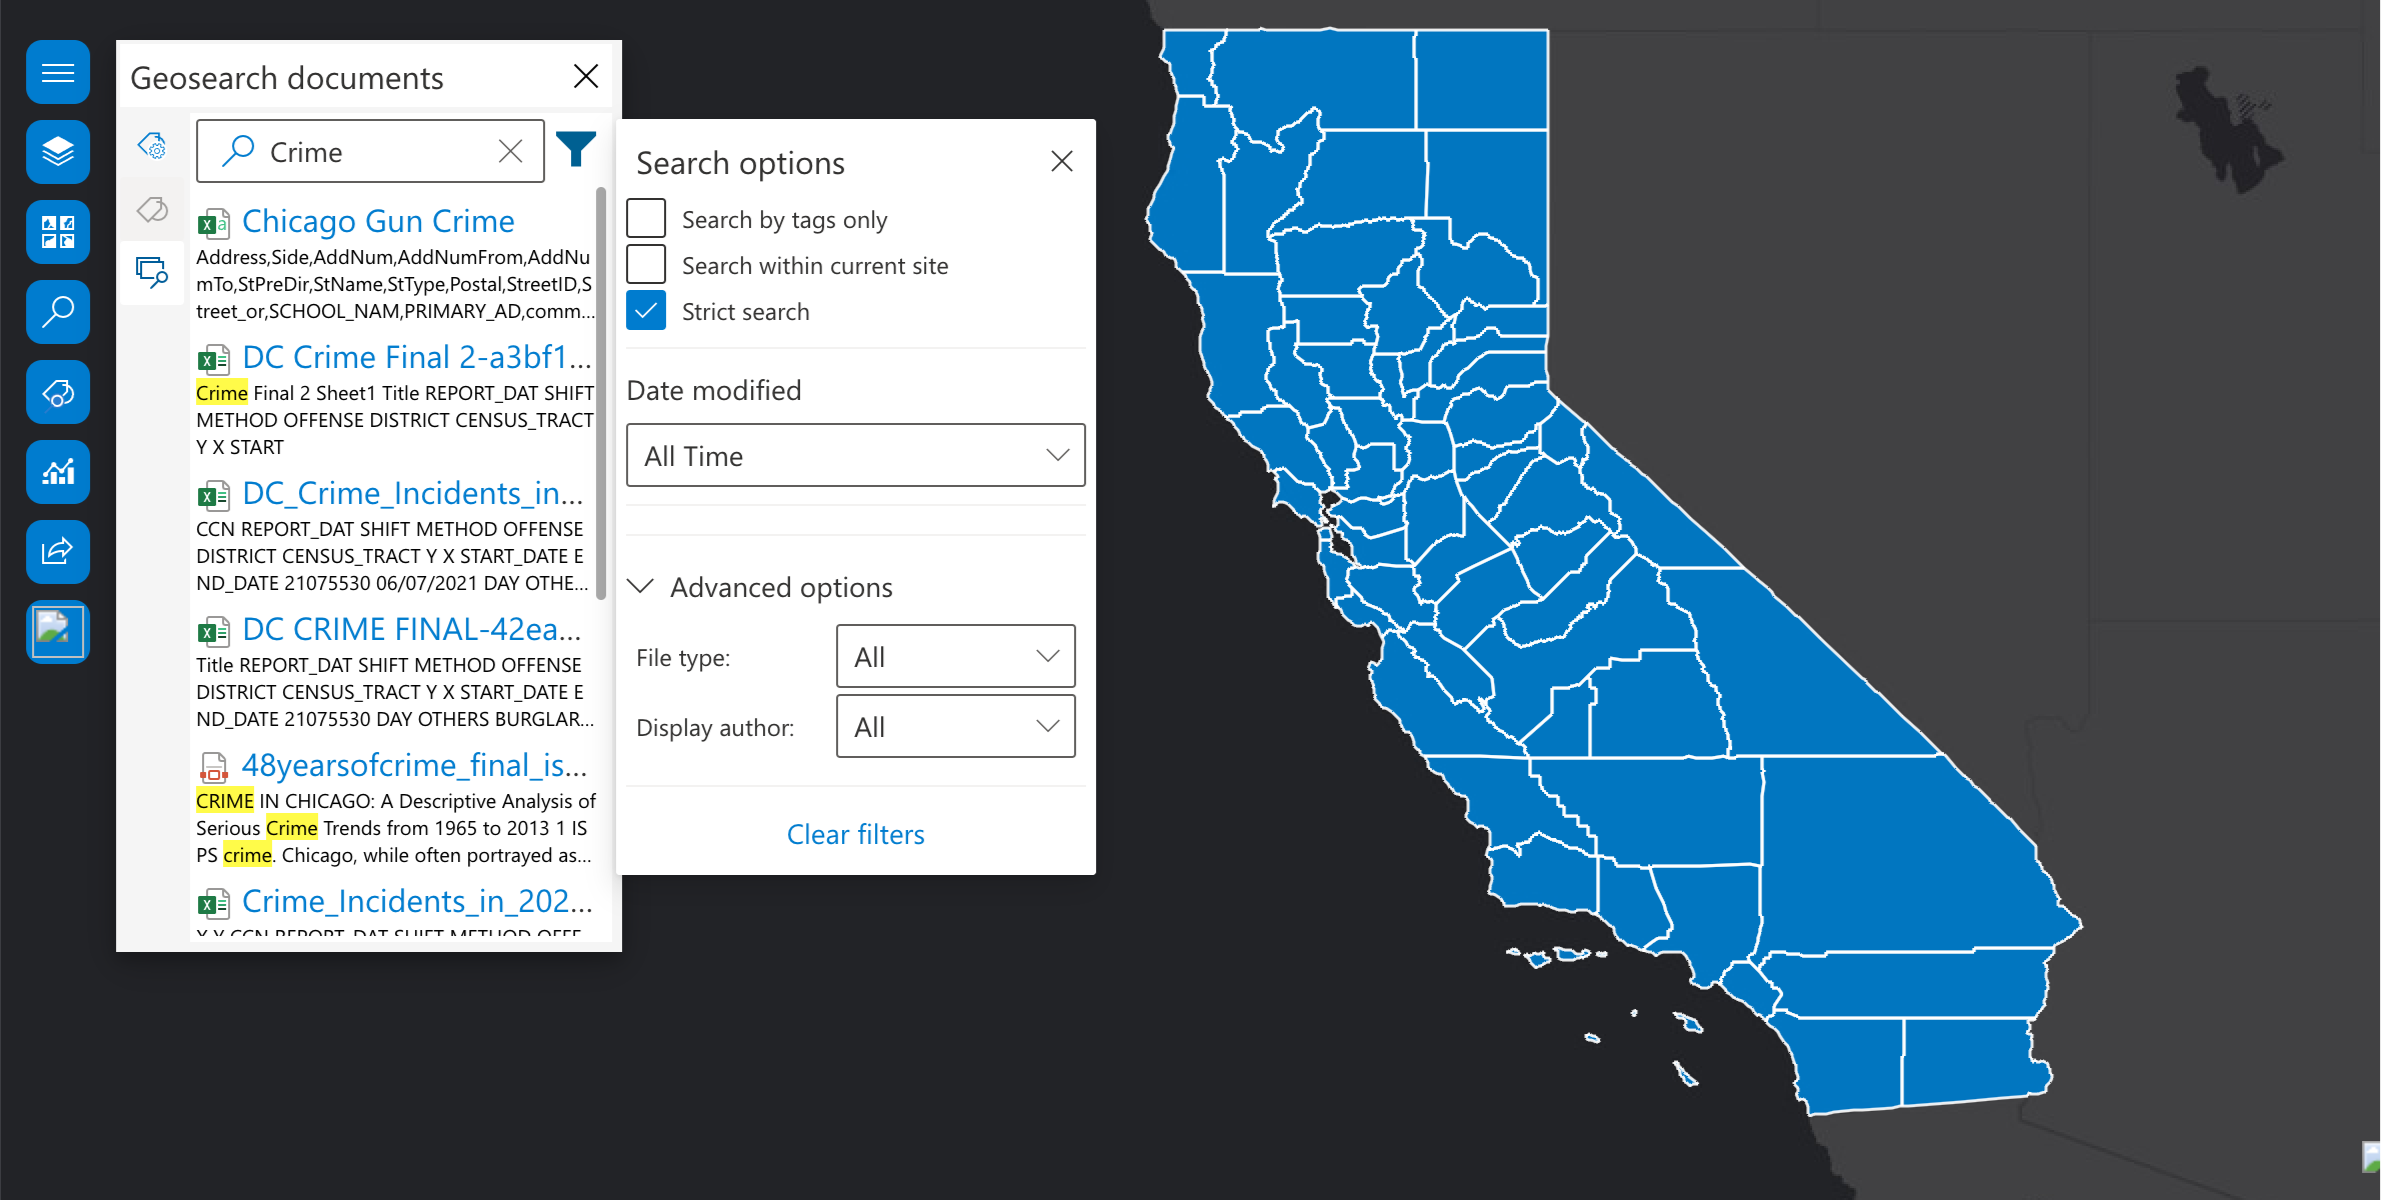
After tagging, any of the items can be searched by searching tags in the Geoseaarch feature as shown below.
Summary
In collaboration with product management, product engineers, and design, we spent numerous hours with one of the largest clients, Geoscience to discuss the pain points in the previous version, driving requirements for the new version, and vetted the proposed designs before implementation. The final design was implemented and responses were very positive with all our customers, especially Geoscience.
